When we parted ways last time, we came to the conclusion that we cannot build our world from small objects, like LEGO blocks, and we need to be more clever. Instead of using cubes, we will be using horizontal strips with a maximum width. Then later we can further optimize it by leaving out invisible strips, but in the beginning we’ll just be happy to have the strips working.
Since we can’t use Irrlicht primitives for this, we’ll fall back to vertex lists. Oh, what joy! To keep things simple, I will only concentrate right now on strips that are on the “top”. The top of a cube is a small rectangular plane section, and putting such sections in sequence will create strips.
We first want to create such a plane section, a rectangle. Using vertexes and triangle strips, we’ll need two polygons and four vertexes. Let’s create the first triangle: we create a vertex at coordinates (-5,5,0), the second at (5,5,0) and the third at (5,-5,0). This way, if we consider our triangle an object, it would be “centered” on the origin. But 3 vertices does not a triangle make. We need to give the order these vertices will be used to create the polygon: 0, 1 and 2, nice and straight forward. Here is the triangle with texture, but color coded (green is the first vertex, red/purple the second and yellow/orange the third):

To create the second triangle, we need one additional vertex with the coordinates (-5,-5,0) and since we already have 3 vertices whose coordinates are appropriate for the creation of the new triangle, we’ll reuse it, creating a triangle out of the vertices with indexes 2,3 and 0:

Then we parameterize a little our creation, and now we can create such “strips” as normal objects. Let us create 11 such objects, aligned on the Y axis:

So if these strips are normal objects, then won’t these objects suffer the same limitation as normal objects in regards to total number count? Yes, they will, but since we parameterized strips, we can create them with any width. Here we have the same number of objects, but with strip widths going from 1 to 11:

The only problem is that the texture now gets stretched. We can fix this:

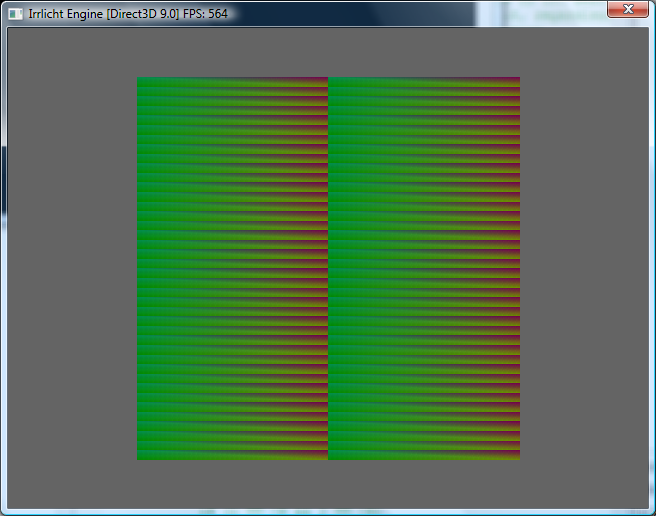
Pretty good, considering I have absolutely no idea what I’m doing and had very little knowledge on this subject before researching to write this post. Let’s see these stripes again, but without color coding:


I’ll reactivate the color coding and keep it on for the immediate future because this way I can easily tell visually where a strip starts and another ends. Using these strips, we can create a larger rectangular area:

And use multiple such "boxes" to create larger areas, like this one that is equivalent to 40x40 cells:
And for the final test, we go with the 300x300 map:

A good start: almost 30 FPS and smooth scroll and camera movement. This is for the entire map visible, the worst case scenario. While scrolling around on smaller portions, we get between 60 and 90 FPS.
I realize that what I am doing here is child’s play. These techniques are very simple and I hope to be using some engine that does a lot of complex optimizations on its own. But in order to understand, use and even appreciate these potential optimizations, I must understand a few things on my own.
Join me next time when give a little shape to these planes!
No comments:
Post a Comment