Tuesday, January 31, 2012

73 – When it comes to coding I am!

Here it is, Snapshot number 4:


Better than ever :P!

Let's go thought he changelog:
  • New LOD system. I talked about it extensively. I get he feeling that this system will serve me well for a long time. But I've been mapping out the weight of the nodes in my mind as I was testing and I think I've discovered a counterproductive pattern. I really need to write a quick real-time LOD level visualizer for the entire map, like a mini-map, so I can prove this theory. If it turns out to be true, I already know what he new weights should be in order to improve visual quality even further, but I am not going to do it now. Untextured objects have quite obvious LOD transitions. Here is a video I recorded earlier this week, so check it out and it's ample annotations:


  • The Options dialog now has an extra LOD setting: Ultra.
  • Recreated all the low LOD meshes for items to be better suited for the the new LOD system.
  • As traditional for a new snapshot, a new GUI. I'll talk about it in detail another time, after I make sure it is stable.
  • Keyboard bindings have changed around quite a lot.
  • Optimized shallow item population algorithm probably to the max!
  • Optimized floor building algorithm.
  • Because I am trying to finish floors 100%, this update focuses on floors. Walls are thus temporarily removed so you can interact with floors.
  • Stone floors are back. You can change between stone and soil floors with a few new tools.
  • Implemented shallow floor building. While shallow building can't always be used, when it can it stacks with the above mention floor optimization, giving an impressive boost in performance. By combining these two techniques the floor system is 90% there at catching up to the item system. I still need to re add smoothing/engraving and add roads. All mouse based selection updates on floors greatly benefit from this stacking.
  • Using the above two mentioned optimization, I mad grass growth about 100 times smoother. Updating the entire surface of the map (grass only grows on the surface) when every cell can have grass takes a single digit number of milliseconds, depending on CPU power. If in the long run it still turns out to be too slow, I can always break the update process into two. As said in this video, grass is still a little bit simplistic, but it is a good start:


  • BUGFIX: Fixed crash when releasing the right mouse button outside of the main window.
  • BUGFIX:  Hopefully fixed most of the weird behavior when releasing the right mouse button outside of the main window by implementing a rudimentary mouse capture system. Only time will tell if this is enough. And testing. Test it!
  • Implemented middle mouse button click support (still no mouse wheel support, so no zooming with the mouse wheel).
  • Made the window (when not running in full screen mode) resizable. The GUI does not scale or reposition yet.
I also made a quite random video:


I am fairly confident that by snapshot 5/6 I'll have most of the wold interaction tools in place. One more snapshot after that for workshops and I can get started on them dwarves.

Wednesday, January 25, 2012

Screens of the day 22 - I am a real artist... derp

I just love the new LOD switcher! It works great. It has better visual quality and uses considerably less CPU to update LOD levels. Everything is quite snappy. It even uses slightly less resources, so it even renders faster. Pop-in is not completely gone, but I am happy with it's current levels. So I have an engine which supports tens of thousand of objects without bill boarding and pop-in is (IMHO) minor. Has anyone else created such and engine before? I want to find the best there is at stuff like this. Please link me to such and engine or game if you know about it's existence. The only thing that comes to mind is the Total War series.

I also managed to adjust the LOD system it to work for top down mode. It is not quite as good as the old one for top down, but rather than looking back I'll keep it for all modes.

I also tested fly camera and the LOD switcher works great. While doing this I realized that I was still running on the quarter map, so I redid the experiments on full map. It still runs great, but 90K objects on "ultra" sure gives the good old a run for the money. I am getting between 50 and 60 FPS under these settings. But with only 22.5K items ultra works great! I don't know how many object a normal map will have, but if it's under 15k I'll probably add "Super Duper Ultra" mode too.

I tried to take the finished model of the barrel made by BrewStew and adjust it for the new LOD levels. Near the middle point I made a mess of things and I had to revert back tot the base model and start over. This after an hour of work. Second time it only took me minutes. After you get some practice with Blender you can become quite fast.

Confident in my abilities, I decide it is time to do my first ever texturing job. I chose the chest. Under Blender the results look absolutely horrible and I am ashamed of them. In game it looks a lot better. Still  a poor quality texture, but it is OK for my first try:


Of course I went in with no plan, no measurements and no sense of proportions. I make extremely poor use of the texture's resolution and I managed to screw up the little handle:


How the hell are you supposed to open this chest? Good job, mister texturer.

Then I decide to test out the barrels. They look great, except for the old problem of the seam. I tried for about an hour to fix it and I couldn't. Then I modeled a new barrel. Not quite as good as BrewStew's, but not bad. I am no longer horrible at this. This didn't work either. So I modeled another one. For this one I had the theory that the seams that were marked inside Blender are the cause. And I was right, because after I fixed all the problems caused by the seam marking in Blender on the original barrel (just removing the markings does not fix this), we got this result:


There is still a small seam. Can you see it? But look at the chair to the right to see how bad it used to be. Here is the same picture with the seams marked:


I have a theory that these seams can be fixed/improved by texture work. I'll try and mirror the two corners of the texture where the seam is. This way the GPU should blend the border of a mirrored image, basically creating a tiling effect. If this does not work, still the new seams are barely noticeable.

I also need to export normals from Blender. Without Irrlicht computes it's own normals and quite frankly the results are not that good.

You will also notice that everything is more shiny and bright. I'm not sure about the shininess, but the brightness I like. I needed to stick a ton of lighting on objects to not cause them to be super dark. The change is done by different export options. Now maybe I can try alternative lighting. Probably still need the help of a professional. Somebody who's done lighting for games in the past, who can look at my meshes and give me advice on all the 9000 parameters lights and materials have.

I'm off to retexture the chest again and fix the seam on all objects now that I know how. Anyway, after about 6 hours messing around with Blender I am starting to get comfortable.

Tuesday, January 24, 2012

72 – WTF LOD case study, part two

Welcome back to part number two!

Let's see what we get if we use LOD switching with my traditional technique from top down view of a quarter map with 22500 chests:


Memory consumption of  85 MiB with 18 FPS. Of course we will get small fluctuation as we scroll around and zooming can have dramatic effect. Still a huge improvement upon no LOD switching. Here is a completely zoomed out view:


Memory use of 29 MiBs, but only 6 FPS. Here is a first person view:


As you can see, there is some gain but not so drastic as with top down.

Now using the new LOD system, we get these results:


Memory consumption has gone down a lot but the FPS barely feels it. With this item density and this weak computer I could work actual miracles and the FPS won't improve that much. I shouldn't give away all my secrets, but here it is:


So after the practical experience of playing around with the new LOD in motion and getting a feel for the distances, I recreate some of the low detail meshes and create four performance profiles. Some of the new meshes are not quite as low as they could be. Rather than getting the best ugly performance available, I instead made sure that things still look good and if performance is not enough, you'll have to use a lower profile. Now, using a good computer, the "high" performance profile and adding back some color we get this:


"Medium" profile:


"Low" profile:


You may be wondering: "These look identical. What gives?". Well as static images there is not a lot of difference. In motion on the other hand, the level of the quality profile controls how much pop-in you will experience. And as object density gets lower, pop-in becomes more and more noticeable because you don't have as many object obstructing you visual path. On "high", pop-in is barely noticeable if you walk at a specific angle relative the bright side of the map.

But what about the fourth quality? Well this one is called "Ultra" and it will burn you up! Well, actually it is still quite tame and far from having zero LOD switching, but it is a huge step up from high both in quality and system requirements. I for one will be using Ultra because my laptop can handle it:


But what about top down mode. Unfortunately, the new LOD switcher does not like top down mode. It is designed for first person. But as you saw in the last post, top down mode is a lot faster, so I'll keep the old LOD switcher for top down and the new one for first person.

The quality profiles are not set in stone yet and I may adjust them. I also need to do intensive CPU profiling to make sure that the new LOD switcher does not over strain the CPU.

But most importantly, I need to get the chest textured and see if it still looks good with the new LOD switcher. UV mapping! This is going to be painful! And ugly!

71 – WTF LOD case study, part one

I need to make sure that slow but steady progress is made towards finishing the models required by the game and that the process of getting the assets in game is perfected. I am not going to bore you again with barrels, so today we'll use chests as an example. 

And be warned: wackiness will ensue. I have absolutely no explanation yet for some of the weird stuff that is going on. And I apologize for the length of the post.

Here is the chest mesh created by BrewStew:


Pretty high quality stuff! Probably too high. Blender reports that it has 184 vertices and 169 faces. But Blender faces are polygons while in the 3D engine we deal with triangles, so this mesh is actually 184 vertices and 1014 indices. How do we get from 169 faces to 1014 indices? Well if we apply a Decimate operator to the mesh and parametrize it so that it does nothing, leaving the mesh intact, it will report 338 faces, and... that leads us nowhere. Or wait! If blender has changed the emaning of faces from polygon to triangle, we get 338 * 3 = 1014 . On the other hand 169 * 6 = 1014. There, that's it! It makes sense. If all polygons have 4 vertices we need two triangles with 3 vertices each to represent that polygon. Each triangle has 3 indices to select the correct vertex, so we have number_of_faces * 6. We'll call this mesh A.

Taking this mesh and applying smoothing to it leads us to this:


Maybe not the best result. What if we only selectively smooth:


Look like this need more thought. I'll just go with flat shading for now and see what happens. Our goal is to try and reduce mesh complexity. First step is to remove that elevation shift in hope that we can compensate with a texture:


A lot of detail is lost, but the idea is to use this only for objects that are further away. We can go one step further and remove some back-facing handle detail:


The difference is minor for the handle. Blender says we have 128 vertices and 107 faces. In the engine we have 128 vertices and 618 indices, so the formula holds. This is mesh B.

The final step is to create a really low detail mesh:


This is just an approximation, but it is meant to be viewed from great distances where the loss of detail is hard to notice:


That speck still looks kind of like a chest. I'm thinking of removing the handles and baking them into the texture for this LOD level. Metrics: Blender 32/19, engine 32/114. This is mesh C.

In the past I used the Decimate operator to simplify meshes for low LOD. The problem with it is that you can only use so much before it starts to become really ugly and no longer resemble the object. This was the mesh produced by decimate and as you can see it had too much detail and I could't lower it more:


So far so good. I am barely starting to reach the part where I actually start to talk about subject of this post.

I tried to create an uniform stress test: a leveled plain where every single cell is occupied by a chest. Because of the memory requirements for this I am only testing on one quarter of a map. So all memory measurements should be multiplied by 4 to get accurate numbers for default sized maps. And we should have 22500 barrels at once in a scene.

And this is where the weirdness starts: exporting mesh A with either smooth shading or flat shading (as *.obj) and without exporting normals has the same look in game. I diff the two exports and see that one has the smooth flag set to off and the other has it set to 1. Going into my importer/exporter and deactivating Gouraud Shading makes everything ugly and setting the normalize normals flags has no effect. Recalculating normals with the CPU has no effect.

Now when exporting normals too things start to become really weird. Doing so with flat shading causes the vertex count to jump up to 652 while index count remains 1014. Exporting as *.3ds makes the vertex count be equal to the index count, as in 1014 and the up directions behave differently from *.obj. Exporting as *.dae has again 652 vertices, yet another up direction mapping that is different and a different scale factor. Awesome.

So I guess I'll continue the experiment with the smoothed look. First step is to fill the quarter map with high LOD meshes. I've updated the little counter to only count items and ignore terrain and I am running on a weak computer so I can really see the difference:


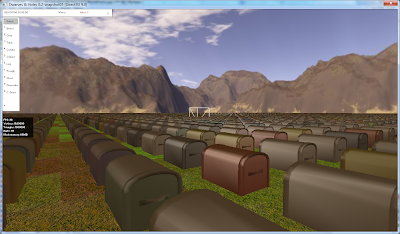
I won't list all the values, suffice to say that mesh A eats up 184 MiBs and has a FPS of 17 from top down view. From first person things are much worse:


While memory consumption and item count and complexity is exactly the same, from this view point frustum culling can't eliminate as much of the scene and we only get 3 FPS.

Let's repeat the experiment with mesh B:


We now only have 124 MiB memory use for item meshes and one extra frame/sec. I won't add another picture with top down view, but we get a FPS of 23. And one final experiment with mesh C:


Memory consumption is at 29 and we have 16 FPS, while from top down we have 46. Using this low detail mesh I had to make sure that I export the mesh smoothed and with normals because otherwise it was too flat (especially from top down view). Strangely, this had absolutely no effect on vertex count, like it did for mesh A.

Oh god, this post is soooooo long. I'm sorry. I am nowhere near done, so I have to break it up into two parts.

So join me next time when we see what can be done with LOD switching. With the help of this technique we can get high visual fidelity while maintaining a reasonable memory consumption. I'll show the benefits of my old LOD technique and see if I can get better results with a new idea I had for it.

Snapshot 3 is up!

Yes it is!


Approval went though OK, but I don't know exactly what they do with an upload. Could be anything from a cursory glance at the description to a virus scan to an extremely thorough test and in a few hours I am going to get the most comprehensive and complete bug report collection from my entire career as a programmer from the IndieDB staff. I am OK with all variants except the first one :). Anyway, I checked with Avira for viruses. Indeed, snapshot 2 seems to have been infected with a trojan but my system is not infected, so I guess that the infection took place on the way from my dev computer to the MegaUpload upload. Mega!

Don't have any feedback yet and I hope that everything works smooth. I had to upload twice. Remember when I had the strange bug of FRAPS not working with DirectX and horribly crashing OpenGL. Well, it was back and present in my first upload. I think I tracked it down to mixing a MSC9 compiled DH with the Irrlicht.dll from the official repository. Compiling with MSC8 fixes the problems and FRAPS is working again and I have no random crashes.

I also couldn't help myself, and a few hours before upload I wrote a mesh importer/exporter for a blob archive. Now all meshes are imported from the same file, making my life as a packager a lot simpler. It was easy to write the importer and exporter and geometry worked fine, but I couldn't get it to shade properly. It took me over an hour to fix this and now I have much better understanding of Irrlicht materials. Using my new hard earned knowledge, I adjusted lighting a little. It is not a new lights setup, just the parameters were adjusted and the world seems to be just a little more alive. Lighting is subjective and some may not like this change, but I think it is a nice first step. No screenshots for you. You'll have to download and see it in action.

Monday, January 23, 2012

Will it pass?

I went though a crunch time this weekend making sure that everything is good for snapshot 3. I think I even managed to do some harm :).

There are tons of small touches everywhere, most of them visual so I'll only list the big ones:
  • The launcher is now a launcher and is all polished up.
  • New option to control LOD switcher aggressiveness. This option was detailed in the previous post.
  • Floors have caught up technologically to item creation...
Well, sort of! I am wary of introducing such a huge change one day before snapshot 3. So the new terrain builder can do the work, but instead it only measures, calculates and estimates. I added 3 tons of asserts and checks making sure that these measurements are the same as the old builder provided. By snapshot 4 I'll have enough data and confidence to go with the new floors.

Still, the new scrolling weights plus the speed plus the added cost of measurements may have added a slight jerkiness to scrolling on some machines, only in top down mode. I am afraid to change anything more before snapshot 3 is uploaded.

So right now I'm of to write instructions on IndieDB for controls and after that I'll start the upload and notify you with link once it is done.

But here's the thing with IndieDB: everything you do needs to be approved. Can't say that I mind since it seems to raise the quality and make it a more pleasant corner of the Internet, but sometimes it can get annoying. I wanted to say hi to IndieDB community so I posted a small news article saying hi and saying a few words about what to expect from future releases. The post took over a day to get approved, and then it got archived, meaning that it is still there and accessible, but only for people who go directly to my profile. So the rest of the community has no idea I posted some news. not a huge problem because of the content, but what happens if this is done to some very important news. About dwarven terrorists among you!

The thing I am trying to say: even though I upload today, it may take a day or two for the approval process to finish once once it does there is no telling what the result it. I'll keep you posted.

In other news, I am investigating for a way to merge my meshes into some kind of a blog format. I really don't like a ton of files messing up my folders. I think I know a format that will greatly reduce loading times. .obj are not knows for their fast loading times. I hate loading times.

And an interesting fact: I switched Blender versions a while ago. I haven't reexported my meshes in ages, but I did try to do so yesterday. Here is the result for barrels:


The lighting is all different. Come to think of it, this makes more sense considering what lights setup I use, but it is still too bright and shinny. So I have two choices: revert Blender version or redo lighting.

What do you think about this shading model. It is far to bright, I am right? On the other hand it finally has some specularity to it. In the past it did not work. Have you ever noticed specularity in any of my screenshots/snapshots? Could this be caused just by the Blender version switch? The old one had two check boxes: one for normals and one for "high quality" normals. The new version has only a check box for exporting normals.

And I can't seem to get rig of the annoying seams. Could it be that normals one one side of the seam are different that on the other and this is causing a shift in the intensity of the light?

Sunday, January 22, 2012

Dwarves & Holes is now on IndieDB!

The approval process finished successfully!!! I am so excited! Dwarves & Holes is now on IndieDB!


And it was about time! I've been planning to do so for ages. Things will pretty much stay the same for this blog, but the more interesting news will be mirrored on IndieDB. Snapshots will be uploaded there from now on. I think you can download without creating an account. And things should be safer than ever because i'm sure they also have their assortment of antivirus tools in order to protect their own site and customers.

So Monday's snapshot 3 is on schedule. I still need to do some packaging work. Actually, now that I am on IndieDB I'll make sure that things receive just one extra coat of polish! Also people there don't know anything about my project or its history so I'll write a few tutorials to bring everybody up to speed. I'll post the content of the first tutorial here after the break. You will see that extra layer of polish I was talking about with the launcher.


So you have downloaded one of our snapshots? Now what? If you are a first time user this small little tutorial will guide you through the process of installing and configuring your game.

Currently we are releasing our snapshots as simple ZIP archives. No installation is required, just unzip the archive at a location of your choosing. Only 32bit Windows builds are included in the release right now. After you have unzipped with the tool of your choice, you will have a new folder called "Dwarves & Holes".

Windows Vista and Windows 7 users that are running with UAC (User Account Control) should take care to unzip into a location where their user has read and write access without needing administrator's privileges, in case the game needs to save data. Example of bad locations: C:\Windows, C:\Program Files. Good locations are inside you user's folder or any other location where you were never asked for permission in order to write to that folder.

In your "Dwarves & Holes" folder you will find three folders:
  • bin: this is the home for the game's executables. In the "win32" folder you will find the files that you need. "dheditor.exe" is your game launcher, so you might wish to create a shortcut to it on your desktop. Since every week a new snapshot is released you will have more and more reasons to launch the game. "dh.exe" is the main executable of the game. You can use this to boot it up and skip the launcher if you so desire.
  • content: this folder is the home for your content packs/mods. Dwarves & Holes has been designed from the ground up with mod support in mind. Every content pack or mod (collectively called mods from now on) has its own subfolder here.
  • data: this folder contains generic resources and is also the home of your configuration file.

So you could just boot up "dh.exe" and pray for the best. But for first time users and for every new snapshot it is recommended that you launch "dheditor.exe" at least once and check the configuration to make sure that it is up to date and no new interesting configuration options have been added that you might want to check out. Let's check out the launcher:


It has the following options:
  • Launch game: pretty self explanatory! Press the button to launch the game!
  • Launch editor: since Dwarves & Holes was designed to be instantly modable we needed to provide a tool that would facilitate this. We don't like having to edit obscure text files. So we created the editor. The editor is almost as old as the now discontinued 2D version of the game and while it has stood up to the test of time quite remarkably, the current version is a little bit behind. Please give us some time to fix it up! Until then you can still play around with it, but to make sure it causes no harm the editor is currently set to read only mode. This means that you can do what you wish to it as it won't save the changes to disk and thus it can't cause any harm. A detailed tutorial on how to use the editor will be posted in the future, but for now a screenshot will do:


  • Options: here you can configure the game. The rest of this tutorial will cover the options.
  • Exit: another  self explanatory option. Click it to be on your way to more productive activities.

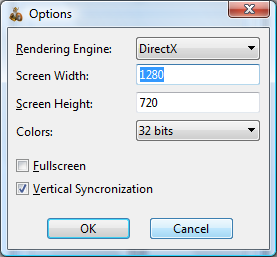
So there is one final piece to the puzzle: the options dialog. Let's see it:


It does not have that many options right now but we'll add more as we see fit. Here is a rundown of the available options:
  • Rendering engine: this controls the back end used for rendering. Under Windows you can choose between  DirectX 9 or OpenGL. OpenGL versions at least 1.4 and prior are not supported. Under Linux only OpenGL will be supported. The game is also capable of running in software mode but this is not recommended. Depending on your system setup either DirectX or OpenGL may run better. If you are experiencing issues with one, it does not hurt to try the other.
  • Screen Width: this controls the width of the game window. If you are running in full screen mode you must specify a resolution supported by your monitor and GPU. In the future a list with all the supported modes will be used instead of an editable field, but right now you'll just have to edit it manually.
  • Screen height: this controls the height of the game's window. The same notice from screen width regarding full screen mode applies here too so please make sure you provide a valid value.
  • Colors: this controls the number of colors available for rendering and your two choices are 16 bit colors or 32 bit colors. 32  bit is the default and there are very few practical reasons to reduce it to 16.
  • LOD quality: this option controls how aggressive the level of detail switcher is. The game is optimized to run at a steady 60 or more frames per second on setups that are compatible or better than the target hardware and the "high" LOD options has been designed as the perfect compromise for this goal. So "high" is actually normal. You should ot reduce this option. But if you are experiencing framerate issues you may be forced to. The "medium" LOD option (that is more like low) has better performance while slightly reducing quality. Some popup may be present and rarely the engine might be forced to use a low level of detail mesh in plain sight rather than in the distance because it has computed that it needs to do so in order to improve performance. Setting LOD to medium may be a good way to improve your performance if you are having such issues. Setting LOD to "low" is not recommended. This is actually super low mode! It greatly reduces visual quality, popin is prevalent and use of low detail meshes in plain sight is common. But it has the best performance and may be of use to people who are running on machines that do not meet the requirements.
  • Fullscreen: this controls if the game launches in a window or fullscreen. You should adjust your screen width and screen height options to a supported resolution before turning on fullscreen mode.
  • Vertical synchronization: this options forces screen updates to be synchronized with screen refresh rates. It also causes your maximum framerate to be locked. This option is on by default and it is recommended to be left on. This is not a game that benefits from higher framerate. You should have the same experience at any framerate that is 60 or above. Even running at 40 FPS should have almost zero impact on you experience. So keeping the maximum framerate capped to your refresh rate makes the game work a little less hard, keeping your CPU and GPU load under control, preserving battery life and general power consumption.

Expect more options in the near future! Texture downscaling for weaker GPUs and antialiasing options will be the first new options that will become available.

And stay tuned for further tutorials explaining the game mechanics, interface and editor use!

Saturday, January 21, 2012

70 – Things just got serious

I don't know what a proper intro for this post could be, so I'll just dive into it and see where it gets me, starting with the changelog:
  • Creation mode has a new interface. You may have seen it in my last post. Since I don't have the icons yet, I added text description to the tools. I also updated the terminology a little to be less confusing: a tool has a standard action and a mass action which repeats the standard action for the entire selection. No more immediate what not mass mode. Pressing shift plus a keyboard shortcut simply activates the mass action for that given tool without switching you current tool. I also created the concept of the "grid" and the quick slot, another worthwhile addition to the GUI that I am not going to speak about until it passes the concept phase. Here is a screen shot of the new cleaned-up GUI for creation mode:


  • Tasks for creation mode phase one are slowly starting to dry out, so this is a phase 3 (the final) change: grass grows again! It still does not wither during winter, but I should save something for next week too. The map starts with random grass density to illustrate this point but it will quickly grow. I experimented a little with some color blending to make the map look less checkerboard-ish and I have some ideas to improve upon this, but for now it will have to do. Grass growth is also a little bit jerky. Floor and wall were something I done in the first phases of the project. Item creation has been written and rewritten a thousand times since and quite frankly floors and walls are way behind technologically speaking. As the snapshots come and go, floors will slowly catch up to items. I already did a few first steps. I am not at all happy with the new grass texture. The old one had tons of more personality. But the grass texture is going to probably change every snapshot until I find one that I love. But at least the texture looks fairly good in first person mode:


  • A new tool! Or more precisely one of the tools from the 2D version is back. The clear grass tool. Pretty self explanatory. It has '0' as a shortcut and has standard and mass actions. It will set the grass coverage for a floor to zero. I am thinking about changing the way grass grows based on the proximity to other grass. So that if you clear a large are of grass, the border between grassy areas and non grassy areas is the first to be affected and grass slowly and radially starts to eat up the uncovered area.
  • This one you already saw: skybox support. Need to find a better skybox though. Actually I would like to have several skyboxes per biome and some day and night cycles in the future.
  • And speaking about cycles, the ability to pause the game is back. Because nature simulation is back, but with reduced scope. It will slowly come back to 100%, grass growth being the first step. The game will start paused, but if you unpause it it will run an breakneck speed, making months run by in second so you can experience grass growth. The rate of grass growth is not final yet.
  • BONUS: the editor! Taking advantage of the snapshot system, I like to put things out sometimes a few snapshots beforehand. The editor should not be out for at least 2 more snapshots because it is both untested and has never been updated to support meshes. It still thinks things have 2D tiles. Yet here it is! Play around a little with it. It is accessible from the editor. Because it is untested yet, I made it read only. You can change stuff but it won't save to disk. Once the editor passes though QA you will be able to make changes and test them out immediately in game.
  • W/A/S/D support. Finally! Have you ever noticed some awkward pauses in my videos after I do something. This is because I am pressing WASD to navigate the map like and idiot. Trying to get the video right takes some concentration and I always forget that only directional keys used to work. But not anymore.
  • Dynamic scroll speed. The speed with which you scroll the map depends on how close you are to it. So when really zoomed in, you will have precision. When zoomed out it is fast so you can get to where you want to be. The scroll speed is not final yet and you will be able to adjust it in game though options.
  • Bugfix: problems with the Shift key are gone. It turns out that I am the one who wrote the keyboard hook for the Irrlicht/U++ bridge (who else) and forgot to add special case for shift handling.
  • Bugfix: floors failing to update on selection. Some items will still fail to update, but I have uncovered the cause. I'll fix it until next time.
  • Bugfix: plates on top of tables failing to update their selection status.

And a few more of the small things that I am probably forgetting. Like a slight reorganization of the directory structure to make development easier for me and to accommodate for Linux version. Linux version will be officially supported if possible. And some optimization for animation and stuff.

So snapshot 3 is certainly a huge step up from 2 in both quality, features and stability. I have experienced a single crash while testing. And I'm hopping that one will be fixed soon too :). I estimated that things are going to start getting interesting around snapshot 5 and it turns out that I'm right on schedule.

The list of changes is so big that I don't think I should wait until Monday with snapshot 3. Until then I have time to add another set of features and the change would be too much. So I really want to uplaod it today. But I can't. You may have heard about the MegaUpload incident. Anyway, it is down. I could find another such service, but since MegaUpload was just a temporary solution, any replacement would remain as such.

So I made all necessary steps to give Dwarves & Holes a more permanent home. Regular readers may know exactly what I am talking about. For the rest it will come as a surprise.

There is an approval process involved and I'm hopping everything will go though just fine. As soon as things are approved I'll post again with the link for snapshot 3 and all the information about our new home!


PS: The people doing the approval don't know or care about my Monday based release schedule. And neither should they. Approval takes a few days to complete, so snapshot 3 might not come up on Monday. If it takes more that a few days I'll post about it.

Thursday, January 19, 2012

Screens of the day 21 - Creation mode GUI Preview

If I want creation mode to be a fun diversion it needs to have its own custom and very efficient GUI. The current task based GUI will not cut it. So I came up with this:


I moved the little status panel up to be next to the main attraction: the new toolbar. This toolbar has a fixed structure providing 13 keyboard shortcut enabled commands. Right now only the keyboard shortcuts are visible, but it is going to have (very) (sexually) suggestive icons next to each shortcut. Probably 13 tools will not be sufficient, so I'll make it so that Tab extends the toolbar showing you all available options. The 13 quick commands will be the most used ones and the rest will be available only if the toolbar is extended. Of course each command is a slot, so once you open up the toolbar you will be able to swap out you initial 13 commands to your liking. This is not implemented yet.

What is implemented is the rest. So let me explain: each button on the toolbar is a slot that holds a tool. Tools can be anything from a dig tool to an item that you want to place. The default toolbar will have its first button (shortcut `) set to the select tool. The select tool is slightly more special so I'll get back to it later.The rest of the shortcuts (1-9, 0, - and =) are objects that you can be placed. Selecting a slot activates that tool. Other keyboard commands and mouse command have different actions based on what tool is selected. Only one tool/slot can be selected at a time.

So how do you select a slot? Well, you can click on it. Or you can  press the keyboard shortcut. Selecting a tool does not alter the world. Just because you had the barrel tool selected and now you select the tree tool does not have any direct effect. You need to use the tool.

All tools have a few standard ways you can use them. The default action is executed at a click. The dig tool will remove the block on which you have clicked, the item place tool will place an item on the clicked position and so on. The second action is the "mass" action. You activate this by pressing "F" on the keyboard. The mass action only works if you have a selection, and will repeat the default action on the entire selection. So if you have an active selection, you can press any keyboard binding (or click on a tool) as many times you want to change the current tool and once you press F the command is executed on the whole selection.

So to reiterate, you can only have on active tool. Each tool has a default action activated by clicking which executes the tool on the clicked position and a mass action activated by F that executes the default action on you entire selection.

There are also some pseudo tools/shortcuts. X activates the mass action of the destroy item tool, so pressing X will destroy all items that are selected. Other future such shortcuts will be added, like U for undo.

There is also an immediate mass execute action. This executes the mass action for a command that is not currently active. Let's say you have the barrel tool active and have a selection and you would like to fill that selection with tables and then continue working with barrels. You could press the table tool shortcut (default 3 right now), press F and then press the barrel tools shortcut (default 1 right now) and continue working. Or you could use the immediate mass action of the table tool. Immediate mass actions do not switch the current tool but execute the action as if it did switch, execute and switch back to you initial tool. You activate it by pressing Shift and the shortcut for the desired tool. So back to the example: you could just press Shift-3 to fill the current selection with tables. You barrel tool will still remain active.

The select tool (default shortcut ` right now) works like this: the default action opens up a panel informing you about you selection. This panel will also have other context sensitive buttons in the future. There is no mass action but there is an immediate mass action (Shift-` or right click on the tool). This will reset you selection to an empty selection. Items will not be effected. I made only an immediate mass action because that requires more keys to be pressed and you are less likely to accidentally null your selection pattern. Undo for item actions will be available much sooner than undo for selection pattern change and shift.

I did not forget about people who want to use the mouse predominantly. As said, tools can be selected with a left mouse click. Right clicking on a tool executes the immediate mass action.

This interface is only for creation mode. Normal mode will have either the old interface, or an interface that is even better.

Did I manage to explain things? Or did I confuse you more.

What do you think about the new creation mode interface? You will be able to try it yourselves on Monday.

I also worked on some other things. I put a lot of though on how I want my grassy plains to look and what implications this will have on the tileset.

Right now I am thinking a standard high resolution 2D tileset with detail mapping will do. Ah yes, I learned detail mapping. The real eureka moment was when I realized you could have more than one set of texture coordinates for each vertex. Detail mapping is too early to show and anyway I need a better tileset first.

After getting the hang of detail mapping I also tried out other techniques. This is bump mapping for terrain:


Does not look that good. And this is parallax mapping for terrain, first from top down view:


Is it just me or does this look kind of like a motion blur. Anyway, not that great. Probably I have chosen textures, height maps and normal maps all wrong for this effect to look good. And here is a first person view:


Still looks motion blurry but it is a lot better from this perspective. Probably I won't use this technique for grass floors because this seems more appropriate to wet rock or other shinny surfaces.

There is one caveat though: these techniques can not be used together with vertex coloring. I use a lot of coloring, so if I don't get around this limitation I will be able to apply bump or parallax mapping to only a small subset of the objects.

Wednesday, January 18, 2012

So now it works?

OK, I don't know what the hell hapened. Now it works!!! All I did is recompile. I did get a larger executable though. Now FRAPS issues have fixed themselves without any intervention. Under DirectX. I'm not touching OpenGL with a ten foot pole today!

And I added a single line of code, restricting animation update to only high LOD objects and now it is fast enough for this laptop!

So disregard what I said in last post as simple growing pains for the engine. Except for my dead PC. Still dead...

There is one strange bug though that I only experienced on my laptop: shift-clicking does not register.

Oh well...

Here is a completely unscripted video showing creation mode in first person mode (sans the nifty shift click commands):


PS: I just can't believe the mesh memory display. It is way too low. It must be bugged!

Hardware Failure

I am experiencing some nasty hardware failures on my computer. The worst part of it is that after a few blue screens of death where Windows was complaining about hardware failures my hard disk died. Don't worry, I did not loose the sources to the game. I do regular backups. But I did loose something extremely important: my 40+ hours save game from Skyrim! And my Witcher 2 saves, but I don't care about them too much. C'mon, Skyrim is tied to Steam! Why does it not support Steam cloud? I'll try and pay for costly data recuperation services to get back my Skyrim saves. Or I'll have to restart with a new character. That is going to be the same character reincarnated. My PC is in service now and they said they'll call me in a few days.

Anyway, I bought a new laptop in December. I'll show it you one day. Probably not an optimal tool for development, but it'll do until I have a desktop again. The laptop has a slower hard disk, so it is going to be interesting to see if I can still use FRAPS to capture videos.

Today I'll try and create a video showing the progress at half point to Monday's snapshot no. 3. This post is just a pretext allowing me to post a video and rant about my poor lost dovahkiin, so I'll do a quick change log since I have nothing interesting to say:
  • Fixed a harmful item duplication bug related to mouse handling. Now all mouse bugs should be harmless.
  • Some basic keyboard shortcuts that allow you to populate a large selection with objects. This is an intermediary step toward full GUI support and really puts the "creation" into creation mode.
  • Item creation code received another major optimization. Now it is yet again considerably faster. Still some possible optimizations left. Why optimize it further? Making this code fast has direct benefits on all aspects of the game. And it also allows me to add...
  • Animations! This is a highly experimental feature that I won't work on a lot for now. Unfortunately my special technique that allows for a huge number of 3D objects to coexist is almost mutually exclusive with animation. Not quite mutually exclusive, but it only allows for very CPU intensive animations. I was only able to create a 120x120 world where trees were animated and framerate was low. But after the above mentioned optimization I can create a full 300x300 world with OK framerate. So there is hope that animations will work or at least I'll be able to cheat enough that the world seems animated while only a very small percentage of what should be animated actually changes at once.
  • Did I just say trees? Preliminary support for trees and plants is back. Currently all tree species use the same mesh. And I also have only one plant mesh that I did myself in a hurry. More like a mock up, not an actual mesh. I'll remodel it after I investigate maximum complexity.
  • Very basic GUI is back! I need a new GUI skin :(. I may be able to do some basic modeling and I was pretty good at drawing and painting on paper, but I can barely Photoshop and what I get is fairly ugly.
  • Speaking of Photoshoping, I created a very simple and ugly grass texture set for grassy floors. The way I built it (there are some special rules on how to create textures so that you can avoid/reduce mip-mapping errors at seems; rules that I am only now fully figuring out) the texture is very wasteful, allowing only 4 tiles in a 1024x1024 texture. I'll rebuild it so I can get more tiles into a single texture.
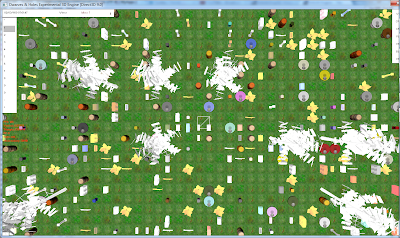
  • The second experimental feature I played around with is 3D cosmetic clutter, like grass. My first experiment was a failure. I think I need a solution similar to Skyrim, where there are only a few patches of 3D grass on a plain textured ground and it still looks great. anyway, here is a screenshot of how my failed experiment turned out:

So let's see the creation part of creation mode! Keep in mind that I wrote this entire post before I could check if my laptop is strong enough to capture videos of the game running a highly experimental and brand new animation implementation, so the very next line you read could tell you that it is not, video cancelled and you'll have to make due with screenshots...


Only kidding! Well, sort of. I managed to capture a video, but not quite as epic as I wanted. Problems started as soon as I began the process: DirectX GUI bottleneck was back! So I switched over to OpenGL. Either my laptop has some problems with OpenGL or the new changes have something to do with it, but OpenGL is unstable. And FRAPS makes it even more unstable. I switched back to DirectX and the bottleneck was gone. I comes and it goes. But FRAPS refuses to record from the game on this laptop under DirectX. I tried Bandicam, but that refused to record both under DirectX and OpenGL. So long story short, this is the best version I could record out of at least 30 tries, out of which all ended in a crash sooner or latter under OpenGL, half the time the moment I pressed the record key:


I managed to rehearsed some more impressive videos under DirectX where I really show of massive item creation and destruction, unfortunately this will have to wait until I have a desktop again, so probably no more videos until then.

Sunday, January 15, 2012

Screens of the day 20 - Casserole

Even though I am not a home, I managed to get a little thing done. I tried my hand at some modelling. I am not a 3D modeler and things are best left to the professionals like BrewStew and Tor, but I probably won't be able to rely on others for everything.

So I modeled this:


Right now you are probably thinking "What super awesome game feature calls for that thing? What is it? Some kind of a container? Maybe a coffin? OMG! Snapshot 3 is going to have combat!". Well, I walked into the kitchen, looked at the first object I saw that was not very simple and then tried to recreate it from memory. It is a casserole.

Blender allows you to render you models using different effects. This render is done with smoothing to make the polygons less visible:


Of course, a smooth operation can loose some fine detail, so I had to go in and adjust the mesh a little, getting this final result:


If you look carefully at the edges and the little ear used to open the casserole you will see that it is more detailed, less blurry and easier to identify the shape.

Now let's see how it looks in game. For some strange reason when exporting this mesh I must face the normals in the opposite direction as all the other meshes I have. Must be some weird Blender beginner's error. But still the result ain't half bad:


But after playing around with smoothing and export options I managed to get this result:


This is so much better! I don't know exactly what I did. First I must see if I can reproduce it. And apply it to other shapes. I don't have the necessary tools right now with me to determine what impact this change has on item complexity and performance. But there is a small chance that things are going to start looking a lot better from now on! And if not here maybe in my next game!

Friday, January 13, 2012

Snapshot 2

This weekend I need to go to the town where I grew up a pick up an important member of my family: my cat. So I won't get to work during this period.

So I decided there is no use sticking to the Monday release date this time, so I'll upload snapshot 2 today. Feature wise it should be similar, but since I am missing 3 days of development it will be less polished.

Let's see the changelog, new features and key bindings.


The launcher is making its debut
In a not quite complete form:


The important part is that it has an options button:


Using this self explanatory dialog you can now more conveniently configure the game. More options will be added in the future.

Unfortunately due to cut time, the launcher is not actually a launcher. The "Launch Game" button does not work yet. In order to use it, you need to start "DHEditor.exe", click on "Options", configure to your desire, click "OK", exit the launcher and start the game manually using "DH.exe". I'll will fix this soon.


New lighting
The previous snapshot was too dark. This one is more bright. I'm really bad when it comes to lighting, so it will take several iterations to get it right.


Creation mode is starting to shape up
Last post I wrote about item deletion. To reiterate, right click somewhere and drag the mouse to define a rectangular selection area. If you right click on an uselected square and drag, you will draw a selection area. If you right click on a selected square and drag you draw an area that will unselect items inside once you release the right mouse button. You can select as any objects as you want with as many areas you want.

Press "x" to delete all selected items, even the ones that are not in view right now.

Added to this is item creation. I wanted to have the GUI ready, but read the first paragraph. So I used a quicker solution for this snapshot. Left clicking cycles though item types. Left click on an empty square to get the first item type, left click on the first to get the second and so on, until you left click on the last item type and the item gets deleted so you can start the cycle from the beginning.


First person camera
It is a little bit too early to add this camera and I'm only doing it to show off my awesome draw distance.

Press "F1" to activate the top down camera. Press "F3" to activate the first person camera. Both cameras have a tendancy to drop you in the middle of nowhere. If this happens with the first person camera you will wind up in the middle of the mountain. Use the mouse to look around until you see some objects in the distance and walk to that location. There is no collision detection so you can walk though the cliff-side/objects.

But the fun part is when you combine first person camera with creation mode. Adding object from a top down view is fine and what I want. But from first person camera: instant Minecraft! Without cubes! Well, at least a very rudimentary Minecraft.


This version was produced in a hurry and it might be buggy. But item density is lower so it should run on a wider selection of machines and stability should be increased because I greatly improved item generation. It is probably not uncrushable, but it should be pretty hard to do so. But please go for it! Crash it to hell and back and then submit detailed bug report :).

Known bugs:
  • Right clicking and going wild with the mouse sometimes fails to select/unselect a few items. Harmless.
  • Unseelcting tables causes the plates on top of tables to maintain their green selected highlighting. This is only visual, pressing "x" won't delete the plates, so the bug is harmless.

Be very careful. You are downloading something from a stranger on the Internet. If you have any suspicions or reason to be weary it is best that you leave it alone. Having up to date antivirus, antispyware and antimalware is a must. Also don't run on critical machines.

Needless to say, what you are getting is provided as is without any warranty. You are solely responsible from any damage caused by the use or misuse, accidental or intentional of this software. By downloading you agree to these terms. If you don't, don't download.

The package is copyrighted to the Flavor Of The Month Group, the development group responsible with the creation of the package. And to DwarvesH with several incarnations across  different social media. A full list of members, materials and said aliases/incarnations is not necessary at this moment but will be provided.


Download link: Dwarves & Holes (0.2-snapshot002)

Wednesday, January 11, 2012

69 – Creation mode

Snapshot 1 went over pretty smoothly. Still I greatly overestimated its stability on random machines so crashes were a lot more frequent than I expected. Not a stellar start but what do you expect from the first version obtained from merging two tech demo candidates over the weekend and stripping out all unnecessary stuff in a hurry. I already fixed some of the bigger offenders and snapshot 2 should be uncrashable on machines with correct specs. Famous last words? Probably! Anyway, to slightly make up for it snapshot 2 will feature a more reasonable item density making it run on a wider area of PCs. But stress test season is not over yet, so still no LOD switching. The GPU needs to feel the sweat! Work it! and stay tuned for some troubleshooting guide at the end of the post.

So what now? To reiterate, my goals is to make the 3D as feature rich as the 2D has been in record time, while still providing a snapshot progression that makes some sense. That tells a story. I figured the best way for that is to implement creation mode, like in Minecraft.

In creation mode you are given free reigns to build without pesky concerns like time, resources or the welfare of you dwarves. Even better, I should be able to pump out a working creation mode in a short period of time. On top of the creation mode then I can layer the rest of the features one by one and have a workflow that allows me to develop and test features in isolation.

Creation mode will have multiple stages. Stage one will allow the creation or destruction of any item in a map with infinite resources. Stage two will allow for the inspection and changing of all properties for objects. And stage three will allow natural interaction with the world: no longer will you place and destroy items, you can do stuff like harvest plants, use workshops and nature will run its course.

Further stages are possible but this is as far as I am planning right now. So basically LEGO without LEGO blocks. Don't sue me owners of the LEGO brand!

The first thing that creation mode needs is a way to select and destroy objects. Selection works as normally and you use the key "x" to issue a delete command.


The next step is going to be to allow the manual placement of objects on the map. More on that the next time.

While developing this I spent 95% of the time fiddling with the mouse selection. While preparing snapshot 1 I realized that the selection mechanism is not prepared to deal with the pure strain of the stress test and would crash, so I disabled item selection. Meanwhile I fixed it, but it was far too slow with so many objects. After a quick mouse gesture it would take a second or two for it to update. So I went about optimizing the hell out of it:
  • I greatly optimized item population algorithm. It is at least an order of magnitude faster. This will have a global positive effect influencing everything, including LOD switching and simulation. The bad part is that a new cache was introduced. I can't cache the entire map because it would take too long and eat up far too much memory so I limited the cache tot he current level. Anyway, you can't select things from a different level with the mouse so this is a non-issue.
  • Mouse update is a lot smarter and able to determine the section borders so it only updates as much as it needs. This also means that performance is directly proportional with the size of the area you select. So don't zoom out really really far and select the whole map and expect it to be instant, but it should still work.
  • Mouse update is now able to determine if your screen relative mouse movement coincides with a coordinate change in the 3D environment, and if not it does nothing.
  • Even with these changes mouse cursor movement was not perfectly smooth. So I implemented shallow update that is only used by the mouse system and does the minimal amount of work necessary to highlight an area.
As can be seen in the video, the contrast of the selected area is not great. I have some plans to improve this but this is not a task of urgency.

There are still tons to talk about, but I'll skip that for troubleshooting. Because of the snapshot system, I won't give troubleshooting advice for older snapshots, only things that are relevant for the next snapshot. So once snapshot N comes out, snapshot N - 1 ceases to be relevant:
  • Performance is poor and/or visual artifacts, black boxes and other strange things are visible: if you are running on DirectX try OpenGL. And vice-versa. Also make sure your drivers and DirectX is up to date.
  • Engine is unstable or sometimes it runs fine, other times it crashes on launch: stress tests are meant to really push the boundaries and up the system requirements. The engine is very sensitive and has a lot of RAM needs, both system and video. Since maps are random it can be that one time it generates a map that it is fine, one time it generates a map that ends up needing more resources than you have and it crashes. Scrolling and zooming can also have this effect. If the current map needs more resources that you have but you have scrolled to a less busy area of the map, once you scroll/zoom again new chunks of memory can be pulled in and it can crash. This will be less of an issue once system requirements are more precisely determined, stress tests are done and general system stability increases.
  • Black screen on start up: either bullet point 1 or point 2, probably both.
  • Some keys like "s" or "d" make the game stop working/screen go blank/do some other weird stuff: the GUI has not been removed, it is only superficially hidden. You actually opened up the inventory browser/dwarf browser/other dialogs but they are not visible. I won't fix this because I want those dialogs back ASAP. As a quick fix for snapshot 2 I disabled keyboard message forwarding to prevent these dialogs from opening (I probably disabled some useful shortcuts by this that you don't know about).
  • Some areas of the screen (near the edges) don't react to mouse movement. As said, the GUI is only superficially and temporarily hidden. There is a window/panel at that given position that eats up you mouse events.