Wednesday, August 22, 2012

85 – Polishing & bumping

Since last time I did a ton of housekeeping tasks and implemented bump mapping. This will be a longer post with a ton of ugly pictures. These pictures were taken on an integrated Intel GPU so they are low res and the framerate is shit.

The first thing I did is separated the height map representation from the terrain representation. Now you have a separate height map you populate with data. An independent terrain object can now read from the height map data when needed. In the future this might open the gate towards Perlin noise and other height map types.

Then I chunked the terrain. Now any size height map (as long as it fits in RAM) can be used and the terrain can take a subset of that height map and create multiple chunks to cover it. Having chunks has a lot of advantages, like having different LOD levels on chunks, doing frustum culling on chunks and even making the game run on Reach profile since I made sure that an individual chunk has under 64k indices. It also has disadvantages: since frustum culling is not implemented yet, chunks are actually slower that one big terrain. Even after culling, the batch size will be larger so terrain will be slightly slower to render. Also physics is slower on many chunks by some margin.

Then I greatly fine-tuned physics parameters. Now things are considerably less wonky and movement is more realistic. Still not perfect, but a great improvement.

Than came a really ugly task. When I first added the barrel model and physics to it I had to create a new "dumpy" model that is centered on (0, 0, 0) and has a width, height and length of 1 in order to tightly bind the mesh to the physics object. This is not really desirable, so I went ahead to implement a better solution. This is easier said than done. Even the simple barrel mesh has bones. I never used bones and it took me over 3 hours to experimentally figure out how they work. I also had a major bug in the bounding box calculation algorithm: both a coding error and a failure to take bones into consideration yet again. Fuck bones! Why do barrels need bones? Anyway, eventually I managed to create a system that ignores model scale and translation and perfectly fits it into a physics object. This is enough for now, but the actual mesh position and scale can be important information, so in the future I'll need to make the system more flexible, by allowing you to choose between ignoring scale and translation, ignoring scale, ignoring translation or not ignoring anything.

Then I went ahead and tried to take control of the rendering pipeline. In XNA a lot of things happen behind an abstraction layer and while I am learning the ropes, I tried to get rid of model and mesh classes use, relying on Update and Draw methods and I tried to manually render a model. This was a lot easier, but I still had problems with bones that I needed to solve.

Then I took my manual system and hooked it up to physics objects mapping. Again had problems with bones, but now I have a good pipeline for matching meshes to physics objects and rendering them with minimal state changes.

The final step was to transition from the shaders provide by BasicEffect to custom shader for per-pixel lighting. BasicEffect has quite a deceptive name and is in fact a powerful and extremely flexible little shader, but I want custom lighting.

I managed to add Blinn-Phong lighting, probably the same that BasicEffect uses and as traditional for my efforts in the domain of lighting, things look like shit now. With BasicEffect things looked a lot better.

But onward!

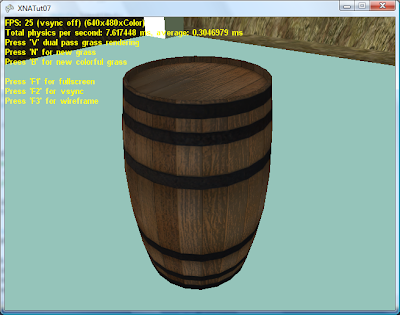
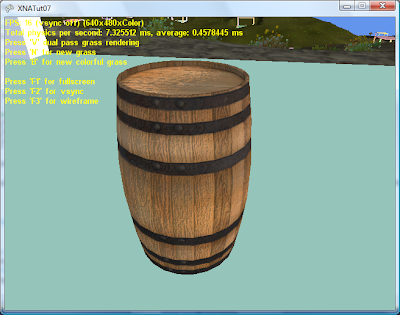
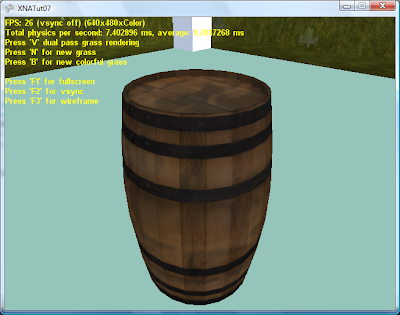
Next step was to add normal mapping. Finally, picture time! Here is a barrel with a brick wall normal map, a.k.a. my first test:


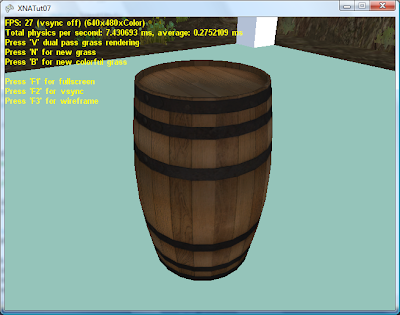
Not a great match, but at least normal mapping works. I created my own normal map for this barrel:


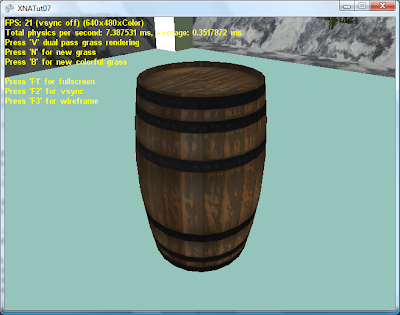
Better, but not that great. How about if we make the bump effect more pronounced:


Yep, better. Wider and more pronounced:


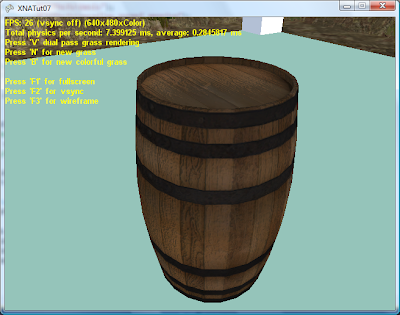
Ohhh God, why! Extraordinarily ugly. In the end I settled for a somewhat rough normal map:


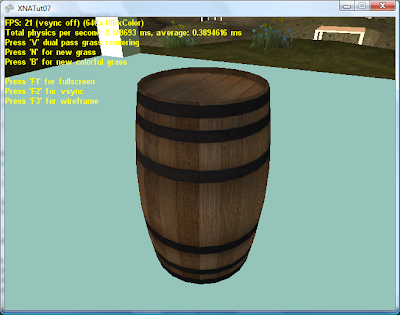
Normal mapping now works, but what about parallax mapping? Well:


It also works. Now if I understand correctly parallax mapping is prone to swirly artifacts and can't be used on some objects. The barrel does indeed present some artifacts. Let's see them on a brighter barrel:


I tried to fix the artifacts and I'm not sure what to think about parallax mapping yet:


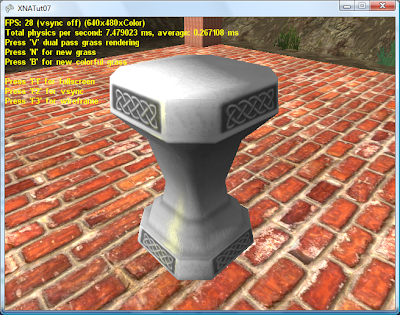
Anyway, the barrel still looks wrong with either normal or parallax mapping. I created the normal map and I suck at such endeavors. But let's see what the shaders can output when feeding them some textured created by professionals. Back in the disco demo days with deferred rendering, BrewStew fine tuned the textures for the stone stool for a good bumpiness effect:


Now that looks a lot better. The textures are not quite as well tuned for this shader and under deferred rendering bump quality was a lot higher, but still, the system works if you feed it textures created by artists. The stool is a little bit shinny and this was the problem I had under the deferred rendering engine. I'll need to fix this somehow.

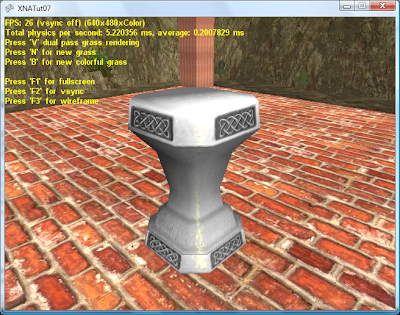
Now the strength of the bumps can be adjusted. Here is the same stool with a "higher" normal map:


And finally, let's take a look at the super artifact prone parallax mapped stool:


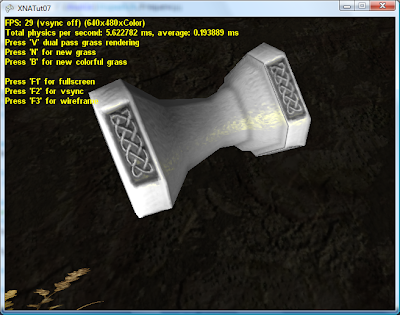
Finally, I physics enabled the stool. For now I am approximating the shape with a cylinder. Quite the poor approximation and will probably be replaced, but it works quite good. Here is the stool blasted off into the distance and landing on the floor somewhere, showing of parallax mapping artifacts:


The next step is to create a pipeline and convention for file locations to easily add any number of meshes and their associated textures. And do major clean-up on the code base.
Tuesday, August 21, 2012

84 – A good second week (and uninspired title)

So I continued development and got this result:


This blog now only has a fraction of its former reader base, mainly due to the months of inactivity, but also because of thematic change of the game, so this is mostly a rhetoric question: does it look bigger? I think it looks bigger. Not huge, but a lot bigger. So surprisingly, the world size is now only 51200x51200x4000. So the volume is significantly smaller, yet it seems larger. Magic! Or the illusion of size has been created by scaling things differently. One of the two. I can't remember.

You may also notice something else in the video: basic physics. A few bugs here and there, but it was a good first try. I am using BEPUphysics (I swear, they spelled it like that to immensely upset compulsive obsessive spelling and capitalization nazzis). I have nothing to compare it too because I have no prior experience with physics (except for a little Unity), but it seems to work pretty good and fast.

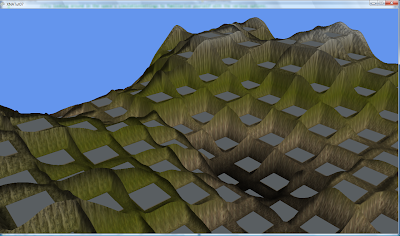
Now, let's make it a little more interesting. We take an intentionally smaller for testing purposes landscape, and create little terraces in it:


Then we add small foundations in the terraces:


Now we can add small pillars in the corners of the foundations:


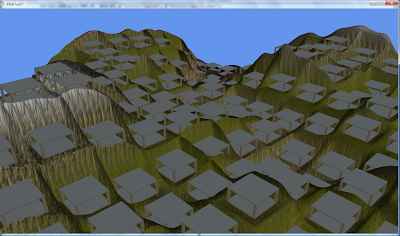
And finally place a roof on top of each structure: 


This forms our primordial procedural city. These placeholders will be replaced with proper buildings at one point.

Then we do the rest of the housekeeping tasks: add some color to the building blocks, re-enable grass and make sure it does not grow under a foundation and finally add barrels to the whole thing. Because barrels, that's my thing apparently.

And of course, we physics-enable the whole map:

Wednesday, August 15, 2012

83 – A good first week

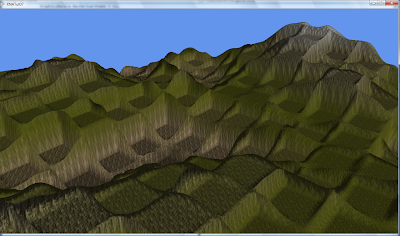
I continued working on the grass, removing the grid and adding real terrain underneath:


So the next step would have been to make the terrain larger and work a little on grass density and clipping. This is where I encountered a huge bug that took me hours to track down. I noticed that once in a while, under different terrain settings it looked weird, but at first I did not give it any further thought. Then when I got my terrain to where I wanted it and with the correct parameters, I noticed how wrong it was: it was very dark, the patterns of the repeating textures were a lot more visible and it ran like a total absolute piece of fish excrement. Like 3-4 times slower. I had another little hacked together project that started out from somewhere on the Internet and I ended up adding terrain here first sometime before my real try of getting terrain to work, so I made the terrain take the same parameters and it looked just fine. I was baffled and ended up creating several projects from scratch and incrementally modifying them until they ended up a carbon copy of the code from the mock-up project and still it did not work. I even diffed the source codes, shaders and textures and they were 100% identical. Then it hit me: if the source is identical, then maybe the project files were different. And they were. In XNA you have a "Content" project, where all the content is stored and transformed for deployment. In this project you have an XML file that contains information about all the entities and for the textures the information was different: it did not instruct on the creation of mipmaps. Now I have no idea why mipmaps are not built by default and how to do this from Visual Studio. Maybe because I am using the Express edition. Anyway, I fixed it by adding this to each texture in the XML file:

<ProcessorParameters_ColorKeyEnabled>False</ProcessorParameters_ColorKeyEnabled>
      <ProcessorParameters_GenerateMipmaps>True</ProcessorParameters_GenerateMipmaps>
      <ProcessorParameters_PremultiplyAlpha>False</ProcessorParameters_PremultiplyAlpha>
      <ProcessorParameters_TextureFormat>NoChange</ProcessorParameters_TextureFormat>
So if you suspect that something is wrong, try this! Somebody has got to pay for the time wasted tracking this down!

This is the result of my efforts: 


Now this looks decent, is less buggy and performs a lot better than previous versions (ignore the massive FRAPS snag in the middle of the video). With single pass grass and lower quality terrain it should work on anything. But there are still tons of problems with it:
  • While grass is chunked, terrain is not chunked yet, so it has pretty poor resolution. You can see how square hill tops are. I'll chunk terrain and then maybe I can get it larger, but for now I want to avoid really large pieces of terrain. Both as a design decision and a way to reduce work load. Implementing terrain LOD switching is a 2-6 week task depending on the quality of the switch.
  • Getting a texture tiling factor that looks good is almost impossible.
  • Getting one for distant terrains is very hard because if you set it too low, your textured will look detailed and non-repeating, but it will create the illusion of closeness. Those mighty hills in the distance will appear closer and smaller. Setting it too high will create and obvious repeating pattern. I did not set it to the optimal value, I had to compromise because of the next point.
  • Your distant texture tiling factor is the same to your close factor, and pretty much any value you select that makes distant lands look good will make the land under your feet look like shit. Selecting a tiling factor that makes close land look good is so high, that it will eliminate all detail from distant lands, making them look like smooth colored and shaded surfaces.
  • Grass does not look good in the distance unless it is scaled up to a ridiculous degree: about 30 times. So I had to scale it all up. A real solution would be to chunk it (already done) and scale it based on distance.
  • Distant grass should really be unanimated billboards.
  • The scale of the land is 128000x128000x20000. Pretty big. In the video you are walking/flying at greatly increased move speed, but even without this the land seems tiny. Scaling is all wrong. Partially because of grass. When I got the grass so high that it looked good in the distance, you couldn't see anything from the grass in first person mode while on the ground. It was a lot taller than you, so I had to raise the camera. Another reason is close land tiling factor. Raising the camera also makes close textures look less blurry and stretched.
So I'm pretty much done with the terrain for now. I'll continue working on the scale of it, trying to make that 128000 wide terrain actually look big and I'll also try a thing or two to make it look more interesting.

So this week: primordial procedural cities and physics!

Saturday, August 11, 2012

82 – A new life

And we're back!

This week (I only started on Tuesday) was about getting the base of the XNA engine down, and while I'm not quite there yet, the week is not over until Tuesday! But you don't want to hear about that, so let's get right to the end and show the first new component and feature:


GPU animated (on two axis) non-billboard grass with dual pass rendering! Actually, it looks more like a collection of bushels and now I'm curious how such a scene would look with very dense short grass textures and a few high such bushels sticking out here and there. Maybe next video :). The idea is to have a general component that I can drop anywhere, like on top of the terrain or in an underground cave, that accepts a vector of points and one or more textures and creates a grassy patch. In the video I am using 4 textures and demonstrate two coloring schemes: one random but quite tame, trying to spit out more natural colors, and out off its rockers! The later could be used  in more alien looking scenes.

Before you ask, the textures are just placeholder. One came from a sample on grass I found on the net, another is random search and the rest are from Skyrim. I needed some good textures to weigh correctly the advantages and disadvantages of different grass techniques and public demos will have original grass textures. A rule of my new committed development style is to stick to what I know best: I'm a coder, not a painter (although I was not a too good but passable non-digital painter). So using this rule for test during development I'll use any picture I can get my hands on from any source as long as it benefits my development process and then let an artist replace it. I'll even use the face of Hitler as a bump map or something if my shader benefits from that! So the look of that grass patch is not even concept art, because concept art generally has something to do with the final look, while in my case I picked randomly textures so I can demo the shaders.

And speaking about the shaders, I'll describe how I came up with this implementation in the tutorial posts, but in retrospective I'll probably should have used billboard grass like everybody does. My grass technique is pretty slow (but I did not optimize it one bit), especially with dual pass. Single pass it is a lot faster, but looks darker and the textures have harder and uglier edges. But with good (and brighter) texture work these problems can be reduced in severity, and since you can switch between single and dual pass on the fly, single pass could be an option for low end machines. And of course, I need to render such densities of grass in patches close to camera. Patches farther away can be rendered with lower density, probably even without animation.

And fog! In the last engine I worked hard on making as close as possible to perfect LOD switching with unlimited view distance and never really considered fog a solution. With my new approach I don't have time for such endeavors, so once I figure out how to do fog with custom shaders, I'll start using light fog to blur everything that is distant.

This technique has the same disadvantage as most: it looks ugly and it is obvious where the polygons are when you look straight down. Billboarding also has this disadvantage, though the visual artifacts are quite different. Especially if you spin the camera around with billboarding while looking right down. You can do this test in 2 minutes in Unity. Such a weird trip. So if both techniques have different but jarring quirks when it comes to looking straight down, in the future I'll add a switch to the grass class to generate billboards if the user/engine desires so. Adding this will be easy and billboard perform a lot better: you need half as many polygons and you can only animate in on dimension.

But I won't add it now. In took me two days of fooling around to get this grass class and shaders done and it is time to move on to a new element of the engine. Let's see what the base engine knows by now and thus things I am starting to master using XNA:
  • Device creation under specific parameters.
  • Device setting management and on the fly changing.
  • Raster and blend state changes.
  • Shader loading and using for rendering, with a few basic shaders written.
  • Created new grass component with GPU accelerated animation in two dimensions and dual pass rending capable of using any number of grass textures and specific coloring per grass "blade".
  • Integrated Dhpoware basic debugging grid component. Probably won't be used in the future a lot, but until I have terrain it is good to see things rooted on a surface.
  • Integrated Dhpoware first person camera with acceleration, mouse smoothing, crunch, jump, run and weapon position support. I need to add collision detection to it and it will be pretty much feature full.
Until Tuesday I hope to get also mesh loading done and rendering with one pixel light, so I can see all the meshes I have in game, but I'll make sure not to overwork myself.

PS: I'd love to make the video smaller so it fits nice in the window, but Blogger spazzed out and won't let me.

Thursday, August 9, 2012

Screens of the day 25 - Grass can make you excited

Wow, a screens of the day post! The last one was a few months ago! Time to correct this dire lackor random screens!

Not exactly the ideal moment for such a post, but I had some good results today and I'm excited about them so I might as well show them of, even if the results are very early, rough around the edges and incredibly buggy. You see, I don't just write tutorials these days. I am actually putting the base of the XNA engine in place, while at the same time learning and evaluating the potential of XNA. I'll write a formal review of XNA after I get a few months of experience with it. Writing basic stuff lends itself very well for beginner tutorials. Sure, since I'm going with the flow and don't have a real lesson plan, the quality is not that great.

Anyway, I am always ahead of the tutorials I have written development wise and more specific features of my project don't lend themselves so well for tutorials, but you'll see this when I get to tutorial number 5, which is all over the place and will probably be skipped and rewritten some day. And while I am not done with the feature I am working on, here is an early WIP screenshot:


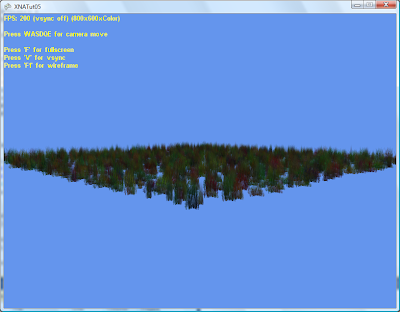
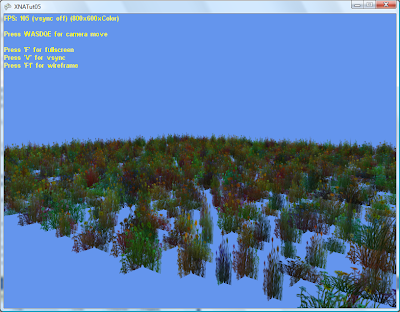
Yes, that' right! Grass! Quite the unfortunate implementation, but it does not look half bad. Keep in mind that this is on my development computer with and integrated GPU, so no antialiasing, filtering or performance. In this screenshot we only have one grass texture.

Now let's try another one:


Since in this one the camera is closer, it does not look that good, but the grass that is farther away looks decent. 

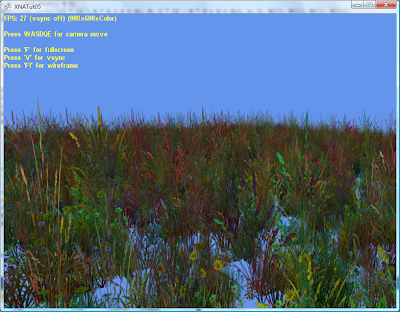
Now let's combine the two grass types (doubling the density):


Decent variety but kind of random and colorful. I'll explain why these WIP screenshots are so colorful and what the bugs are in tutorial number 5.

Let's try three textures with little bit of extra variation in the geometry (T-T-T-TRIPLE DENSITY) :


How does that look? I say promising!

Now if these were the good old days, I'd read GPU Gems 2 - Toward Photorealism in Virtual Botany and GPU Gems - Rendering Countless Blades of Waving Grass until I memorize them, google everything on the subject and spend 2-4 weeks implementing a great grass system. But now I have very strict productivity goals, so we'll see what I can hammer out in a couple of days and then move on. My game is not about grass anyway. It hurts to grow up!

PS: I wonder if one can buy the GPU Gems book series and if you get access to any source code?

XNA4.0 – 04 – Finally some substance

Today we have tons of content to cover so let's get right to it.

I will give you another link to a wonderful series of XNA tutorials that guide you nicely along a path of mastering XNA: Riemer's Tutorials.

First I moved out the bulk of the Game class from the second tutorial into a separate class called BaseGame. It is still a little bit hacky, but it does abstract away a few of the elements that are glue code.

God, I need to learn C#...

I would love to go over this class but there is not time.


We have a few new variables. first we will store the graphics device, not just the manager, because we refer to it quite often. Then we have an Effect instance, a.k.a. a shader. In XNA everything is rendered using effects. If I am not mistaken it is truly impossible to render without one. But don't worry, this doesn't mean that you automatically need to write a shader to render anything. There is the built-in BasicEffect, which allows for reasonable rendering when you do not wish to write a custom shader. So while a shader is always used, you don't need to write one.

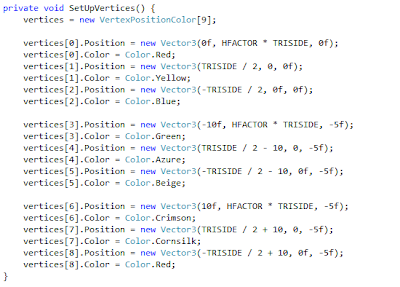
Then we have the vertices vector. Here we'll create a simple "mesh": three triangles. The vertices have a position and a color, as implied by the class name. HFACTOR and TRISIDE are some constants used to fill the vertices vector with equilateral triangles.

Since we are actually rendering something, we also need to set up our view port so we can actually see what is rendered. I talked a little about the world-view-projection matrix in the past. Here we don't need a world matrix because we render all triangles in their final destination, but we need to set up the view and projection matrices, so we create variables for them.

Finally we have a new option to control if the triangles are rendered filled or just wireframe and a variable to control the camera position. Since this tutorial introduces a lot of features, I opted for very simple camera movement, only adjusting the X position of the camera along the axis.

And speaking of positions: I will no longer be using the "correct" coordinate system, like in real life and mathematics. Instead I will using the "wrong" yet pretty much industry standard coordinate system that you find in pretty much all the games and code snippets. This should make incorporating third party resources a lot easier. The old engine also had and extremely annoying bug where switching camera modes made the camera point in the wrong direction until the first mouse movement. I was unable to fix this bug and hopefully such bugs will be avoided using full featured tried & true camera implementations.

But there are two downsides to this. The first one is that I won't be the Messiah who shows the industry that they have a stupid coordinate system. Somebody else needs to rise up to the call, but I'm willing to become an apostle under this new religion. Second, it will take me weeks, probably months to get used to this, so expect bugs where I mix up the Z and Y axis. Even today's simple example was done by checking the coordinate system schema every 5 seconds. I have very deep and intuitive grasp of what I consider a proper coordinate system and am very comfortable with it. Adapting to the new one will be very unpleasant and time consuming. But unlearn away!


Here we see the vertex fill method. Nothing out of the ordinary, just using the constants to add 3 equilateral triangles pointing up and sitting on the "floor" plane. The triangles are sent in a single batch to the GPU each frame.


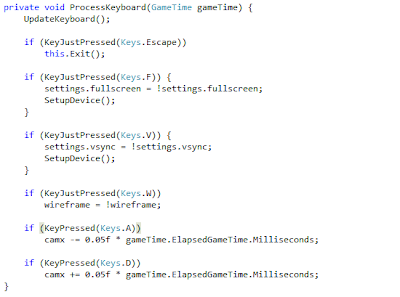
The keyboard processing method is very similar, but you can see a few functions that are called and inherited from the BaseGame class. UpdateKeyboard should be always called first, and KeyJustPressed/KeyPressed are used for detecting the keyboard state. One addition is the gameTime parameter. Since we are handling things when a key is held down, we need to scale all animations and movement based on the delta time between two frames. We added 'W' as a shortcut to control wireframe and 'A'/'D' to control the camera position on the X axis.


Ah yes, the update method. It maintains the same structure: reading input and updating stuff incrementally. The SetupCamera method is new here, creating the view and projection matrices. I need to dedicate a post once only to the subject of matrices, but here is the short version: we set up the view matrix based on the camera postions, where it is looking at and the camera's up vector. We then set up the projection matrix based on the camera's FOV, the ration between the width and the height of the window and the near and far planes.


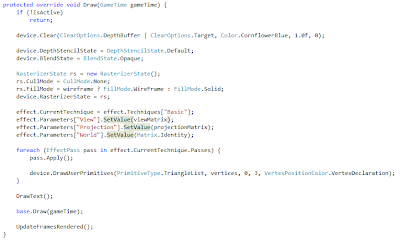
And finally, the meat of the tutorial: the draw method! This one has become more complicated. First, for proper rendering we need a depth buffer and depth test. So when we clear the frame, we also clear the depth buffer. Then we set up the device to use a depth buffer. Without it, triangles would be rendered first to last, covering all triangles before and disregarding the intention of using covering surfaces to create the illusion of 3D space. I'm not 100% sure I set up the depth stencil use correctly.

The using the RasterizerState class we fine tune our triangle rendering. We turn wireframe on/off and deactivate back face culling. This is not necessary here, but since we only have one faced triangles, moving the camera behind them would not render anything and might be confusing for a tutorial.

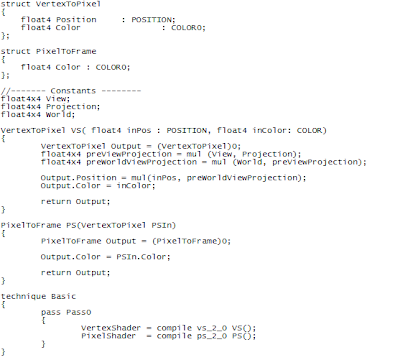
Then we set up the effect constants by sending it the world, view and projection matrices. Since we are not using a world matrix, we send it the identity matrix. The custom shader is written to be flexible and handle all three matrices, but otherwise is very simple, just projecting points and doing color interpolation. For each pass of the effect (which in our case is only one pass anyway), we send the triangle list to the GPU. Then we draw the text overlay, update the frame count using a method from BaseGame and we are done!

I won't be explaining the shader today, but here is the listing if you are curious (no syntax highlighting):


Now let's see the whole thing in action, after a little keyboard rotation:


Pretty good! It even has that promised atialising.

There was one bug though. Yey, my first bug. The engine will compensate for variable frame rate using the elapsed time between frames. With framerates from 1 to a few hundred this worked fine. With really large framerates like the one in the screenshot the animation speed was only correct with v-sync on. Luckily, this was due to my error, an easy fix (20 minutes of googling to understand what I did wrong) and I am not worried about this issue for now.

Here is the full source code: XNATut03.

Tuesday, August 7, 2012

XNA4.0 – 03 – Mad FPS

Today we'll be putting in place a very basic framework that will evolve into the base of our engine. While XNA is quite powerful, you still need to write code for most stuff, unlike Unity where you drag and drop objects into the scene and drag scripts onto objects.

One fair piece of warning. I am new to XNA and things I put together are most likely slapped together, at least in the beginning. In the future I might have to revisit these samples with the benefit of hindsight.

Another one is that I am not sure yet how the content loading works. This sample uses a sprite font external file descriptor. I put the file in the proper place and it failed to load. So I removed the file from the disk, right clicked on the project, added a folder, copied the file in the new folder, right clicked again, chose "add existing item" and then it worked. So I'm guessing the resources you can load must be added to the content project first. I'll update once I figure out exactly what the conditions are and if you can load a resource from anywhere on the disk on the fly.

Now I am way behind since I am porting to C#/XNA and I need to get things running in record time. Ideal situation would be to have first person camera, model loading and dynamic mesh placement on an empty plane done in the first week and for it to be flawlessly executed. This is not a reachable goal, but I'll strive for as much as I can push out considering also the effort required to create these posts. So I need to cut down on unnecessary effort whenever possible.

And for this I am going to use every resource that is available to me. As said, XNA seems pretty popular and there are a lot of ready to use and free components out there. Some of these components will be temporary, just to get things started, while others will more likely become permanent code base references.

The first resource I would like to show you is www.dhpoware.com. This site has a ton of very useful snipets and understanding these can get you started on your path to become the best Pokémon trainer in the world. A few lines of code in the following tutorials will be very similar to samples from there, since I copied and pasted them. In the case of these few lines things have been adapted and are not a straightforward copy, but in the future I hope I can include full classes from there unmodified with all the comments, functionality and copyright notices.

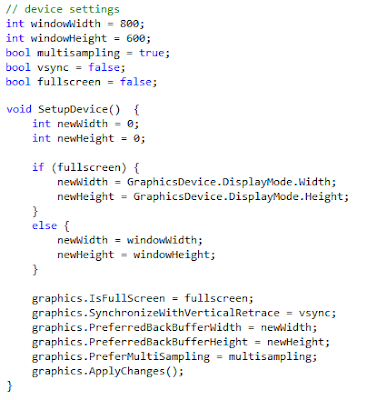
So let's get started! For the second tutorial will add the required functionality, but we won't properly structure the code, so things will be all over the place, to better reflect the natural process of figuring things out. But don't let this excuse allow real bugs to slip though. I'm sure I made a mistake or two unintentionally, if now today, someday in the future there will be ones and if you find them, call me out on them and I'll correct them. I'll use edited screenshots to better organize this post, starting with device setting and setup. Our class will get a few members describing the device and a general function that will update the device setting whenever called:


We have the window height and width which are very straightforward and a parameter to select windowed mode or full-screen. In full-screen mode the actual resolution will be set to the screen maximum for now, leaving further optiones to be added later. We also have one parameter to control vertical synchronization. In practice when developing the engine I want v-sync off, to see how well it performs. When actually playing the game I probably want it on, to both prevent the GPU from overheating from unnecessary work load and for the reduced screen tearing-like effect that sometimes accompanies rendering with v-sync off. The last parameter controls multisampling, a form of antialiasing. This is very bare-bones and not sure yet if it does anything. In the future, especially once we have the GUI back, we'll need finer control, selecting the number of samples and if possible, select between MSAA and CSAA.

Next, we have keyboard and mouse support, more precisely keyboard support and placeholder variables for mouse support:


Normally you'd want to just check the current keyboard state for some keys being pressed, like moving forward. But you also need to detect individual keyboard presses. This is is where the two keyboard state variable come in: one is the last keyboard state and one the current one. Every time you process the keyboard you make the old state become the current one and get a new state. Comparing the two you can detect keyboard events. If in the current state you have a key pressed and the previous state it was not pressed, it means that an event took place. This also protects you from reacting to a key being held down, since it will appear both in the current and previous key state. The helper function KeyJustPressed does this. Using it we check for 'F' and toggle fullscreen mode and for 'V' and toggle v-sync. Such options are purely for tutorial and playing around with the engine. As it becomes more stable you won't be toggling random options like this and use such useful keybindings for more specific stuff, but even here the advantage is apparent: you can change your device's properties on the fly! The old engine did not know this. I could have implemented it, but it would not have been as easy as here. We also added Escape to close the application and removed the gamepad support.

The next piece of the puzzle is text rendering:


We construct a string and using the sprite batch object from tutorial one, simply render it at a given position with a given font. The font is loaded from and XML file describing font type, size and even which characters to include. This is yet again a dynamic bitmap font created on the fly when the application loads, probably having all the advantages I talked about in the DXUT description of such fonts.


As support for this method we have a text position we can initialize anywhere and a sprite font we load in the LoadContent method, after the sprite batch creation, though I suspect this order is not necessary.

The final piece of the puzzle is the frame rate calculation. In the Update method we determine if enough time has passed to update the framerate and in the Draw method we increment the frame counter:


Again, very simple stuff. Both the Update and Draw method check to see if the window is active. We generally don't want to have the game run when it is not focused. In Update you enumerate all process methods. In the real game you'll have to process keyboard & mouse, do collisions, do physics, do animations, update events and all other game logic necessary for one frame. Then you'll update the framerate counter. In the Draw method you'll clear some buffers, render you scene, render the GUI and text overlays and then increment the frame count.

Let's see how our application looks:


Pretty basic stuff, but not bad for only a few lines of code. With DXUT this was a lot longer and I needed abstraction layers over abstraction layers to get a comfortable environment.

This is also a very informal benchmark, telling us the the font rendering is not really a bottleneck. I'm sure that without text we get slightly better FPS, but almost 1700 at 720p means that text rendering is not a bottleneck. Also, FRAPS works fine, which is pretty much a must these days. Hope it will continue to work once we do actual rendering, a.k.a. "the next time". (I'm aware that that makes no sense grammatically)

Hopefully functional source code: XNATut02.rar.

XNA4.0 – 02 – Back from Greece

Yo, back from Greece, yo! Pretty good trip! Hotel was good, not great, but who stays in the hotel room anyways? Food was mostly from restaurants and I managed to eat sea food at almost every meal, except for when I tried some traditional Greek cooking. Great beaches. Kind of light on fun/party side, but that was mostly due to the people I was with, not any inherent ability of that place to provide fun. And they had really fucking huge cats (and with this the family friendly status of this blog is reworked). Not just fat cats, but thin huge cats! My cat is not small by any means, but Jesus! Anyway, very expensive, but overall it was worth it.

So a short post today, where I explain the auto-generated code for a new XNA project and try to add the full project sources on Dropbox. Dropbox should work better for small projects to write once and never update, like tutorials, while GIT is going be used for updating the real project, where I need versioning and what not.

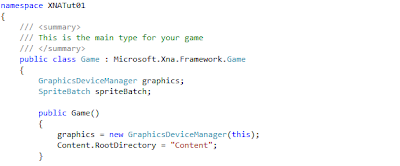
So after creating a new XNA Windows Game, like we did in part one, we can open up "Game.cs" and after the using statements, we should get this:


We have the "Game" class inside the "XNATut01" namespace with two member fields and a constructor. These two fields are somewhat similar to what we had in DXUT. We need to be able to interact with the graphics device on multiple occasions, so we create a manager for it in the constructor and store it for further use. The "SpriteBatch" is used for blitting and other texture based operations, and while this first example does not do anything with it, we'll start using it and never stop. In the constructor we also set up a content root folder. XNA manages the loadable resources based on content folders. Hopefully this is flexible enough and won't spend ages going over the content folders once they grow in size like Ogre3D did. We'll see.

Above we have the "Initialize" method. If you read its description you'll see that this is were we initialize and load non-graphic related resources. Thus is very similar to the DXUT callback system, but shorter and without glue code for the basic app.


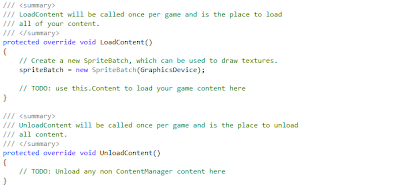
Above we have the LoadContent/UnloadContent pair or resource management functions, again very similar to DXUT callbacks and again the comment do a good job of explaining what these functions are for. You will probably have andeasier time deciding where to put your loading and initialization code in XNA when compared to DXUT. In the loading method we only create a SpriteBatch object. Do not ask me why we create it with the GraphicsDevice class as parameter instead of an instance. I haven't programmed C# in years and I am completely new to XNA. I'll update once I figure it out. There is nothing to do in the unload method.

And that's it for the initialization part. Now we get to the game logic, that has two main parts, the first being the "Update" function that is called once a frame and updates your game's internal state:


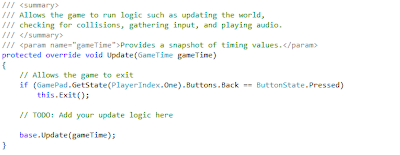
Again, very simple. Here we only check a gamepad button press to exit the application. Starting with sample two here we'll handle keyboard input, camera movement, animations, etc. The only parameter is the "gameTime", giving us the most important information: elapsed time between frames (and a few more bits of information, like total time).

And finally the draw method, that just clears the screen with the lovely cornflower blue and that's it:


Not a lot of new or useful information in this post, just walking you trough a simple sample. In the second tutorial we'll draw some text, show FPS and handle some keys and in the third we'll be drawing our first triangles.

And now for the test: XNATut01.rar. Not sure how persistent this link is, in the future I'll probably gather all the tutorials into a single archive and put them somewhere safe and public.